Chef's notes:
The duck was domesticated a few thousand years ago. And like its distant cousin the chicken, there are dozens of different breeds. The four most common varieties of duck are White Pekin, Muscovy, Moulard and Mallard. These are the ones that you will most likely find at the grocery store. Ducks are not as popular as chicken because ducks are harder to raise and their meat is fattier than the lean meat of a chicken. But in its defense, duck fat is possibly one of the tastiest things in the world. So there! The duck that I use in this article was raised on my brother’s farm. It was Fawn Runner, which is not a species you are likely to find in the grocery store. I got the duck when I went to help my brother and his wife butcher their ducks. Butchering animals is something that I was raised with, so I can handle it. But that doesn’t mean I wanted to eat the duck right away. So I froze it. Which is most likely how you will find it at the grocery store. In the first step below, I explain the best way to thaw a frozen duck. Read on.
Ingredients
- 3-5 # whole duck
- Salt
- 1 small onion
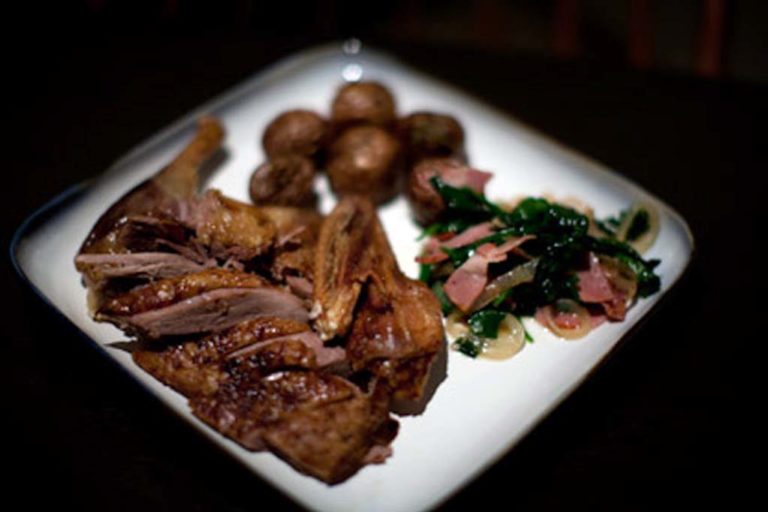
Fresh Farm-Raised Duck Seasoned Simply and Roasted Whole
- The first step to roasting a duck is to find and/or select a duck. At the grocery store they are, more frequently than not, frozen. The best way to thaw a duck is 36 hours in the fridge. The night before you roast the duck, take it out of the package and put it onto a grated rack in your refrigerator. This helps to dry the skin out a bit. If you don’t want to do this, just dry with paper towels before you roast it. Either way, make sure to let it come up to room temperature before you roast it.
- Ducks have a thick layer of fat just under the skin, next to the meat. To help render this fat, you will want to poke about 40 holes in the skin. But don’t poke into the flesh; that lets blood out and will spoil the color of your duck skin. Just look at the pictures farther down to see what poking too far looks like. Whoops. I used an olive fork from a martini set to poke through the skin. It worked well—maybe even too well. Also, at this time, begin preheating the oven to 250 degrees F.
- After you poke several holes in your duck's skin, you are ready to move on to the next step. Apply a liberal amount of salt to the inside and outside of the duck. If you haven’t cooked duck before, just stick with the salt this time and don’t go crazy with other seasonings. Inside of the duck, put one peeled and halved onion. That’s all. ¡No mas! If you don’t like onion, put some orange peel in its place. You want the cavity to be relatively open and free of clutter.
- Put the duck into the oven and roast it at 250 F for 1 ½ hours. Because ducks are so fatty and because duck fat is so tasty, you will want to try to catch as much of it as possible. Build a little aluminum foil box under the duck in the roasting pan to catch the fat. This will also help you easily retrieve the fat halfway through the roast to cook the potatoes in. You are planning on cooking potatoes in duck fat, aren’t you?
- After 1 ½ hours of roasting, the duck should be rendering a good deal of fat. Remove the duck from the oven and flip it over, breast side down. Roast it at 250, breast side down, for another 1 ½. The reason we roast it so slow and low is that we want to render as much fat as we can before we eat the duck. Because when we render duck fat, what’s left in its place is delicious. Plus, it helps to crisp the duck skin, which is absolutely necessary.
- The duck has been slow-roasting for 3 hours now, and it is nearly done. The very last stage of roasting will require a high heat for a short period of time. So take the duck out of the oven and turn the heat up to 400 degrees. This will give you a chance to take the fat out of the reservoir for you to cook with. Once the oven is up to heat, put the duck in and set the timer for 20 minutes. Rotate, and set the timer for another 20 minutes. After 40 minutes, it’s done; take it out and let it rest 10 minutes before carving.
Tips & Tricks
- Carving a duck is difficult to teach, but once you learn how to do it, you will discover that duck is one of the easiest fowls to carve. The duck’s rib cage and skeleton are tube-shaped; this fact makes it easier to cut the meat off.
- Flip the bird onto its breast and find the spine. The meat attaches to about a half inch of the very center of the back of the duck. Use your knife to find where the bone meets the flesh and cut through with the tip of your knife to the ribs. Follow down the spine until you get to the leg. Cut through the leg at the joint. Then do the other side. Once you’ve finished, there should be a strip of skin down the very center of the back of the duck.
- Flip the duck onto its back and cut along the breast plate, alongside the ribs. Cut and peel the meat off each side. If you are unable to cut the leg off at the joint, use a chef’s knife and put the blade directly over the bone. Put the tip of the blade on the cutting board and, with an open hand, use your palm in conjunction with your other hand to force the knife through the bone.
- Once you get the meat of each side of the duck, divide it into portions and serve it. Cut it thin and make sure to serve the skin, too. It is one of the best parts.
